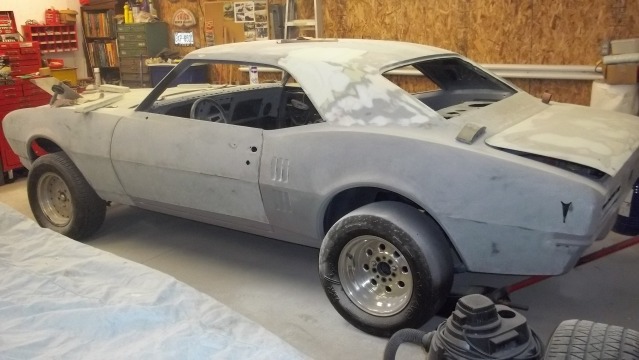
Paint prep

CMOC Rookie
Joined: Apr 2011
Posts: 106
From: Welland
Good idea or you can get enough to spray the door jambs and around the trunck etc..It's got to be done anyway.
Retired Moderator
Joined: Mar 2009
Posts: 3,079
From: Lloydminster, Sask.
That's what I thought. When I had the 95 GT I had some body repair that needed to be done to the hood, and front fender, and when i asked the manager at the body shop what it would cost me to have the whole car repainted, he advised against it, and pretty much said the same thing about not putting more material on than absolutely neccesary.

CMOC Rookie
Joined: Apr 2011
Posts: 106
From: Welland
Yea it sounds like it should be that way but its not.In the old days guys would pile on 15 or more coats a laquer paint because it had to be polished to get its shine.You would rub off 10 coats polishing.Not that much fun.The average new car has probably the equivelent to 3 coats of clear,so you guys who like to us the buffer be carefull you don't burn through.

CMOC Veteran
Joined: May 2011
Posts: 476
From: St. THomas
Sorry about the length of this.
As far as multiple coats of clear goes, clear isn't entirely clear. After too many coats, it becomes yellow. I would never go more than maybe 2 regular, or three light coats. One good one by a good, experienced painter is enough. IMO anyway.
First off, I’m not sure what you know about spraying a vehicle, so it’s hard to give tips now really knowing the person’s experience. Having said that here is some things to remember. First. Allow time for setting up your equipment. Have an old, scrap piece of plywood or something similar. You can use it to test your spray pattern on. I used to set the air pressure at about 80 pounds. Each painter is different, but look for a setting that breaks the paint up pretty good, but doesn’t cause too much overspray. It’s difficlt to explain, but If you start at about 75 lbs. and work up slowly, you should find the right pressure. I’m not real sure about the paint pressure. We used to set it with an allen key to wherever we thought it should be. Different colours had different pressures. Light metallics had lower pressures than dark metallics nad solids. Always keep your gun the same distance away from the surface at all times, EXCEPT< when your ending a stroke where you can’t do the entire surface. Eg. sides. I cases like that, flick your wrist away in the direction your going so you don’t get a build up of paint in one small area. For example, if you start at the front of the side ( headlight area) pull your trigger ahead of the headlight and continue until you’ve reached the edge of the door and flick your wrist away from the front. If you start a the middle of the ( long) side or area, point your wrist away and pull the trigger first, then gradually Start at the top ( roof) of the vehicle. Long strokes are better than short ones. I’d start at either the front or back ( in the middle of roof) and take each stroke past the edge. Overlap your stokes slightly. I’d say about 2-3 inches, maybe more, but be careful you don’t get too heavy a stripe. You’ll end up having to fix these later. I always used to put the paint around the edges first where your spraying. For example, the front windshield edge, the edge of the hood, the trunk lid, back window, the wheel wells. I’d put a nice light coat on the edge of the surface your going to paint, BEFORE I started. That will help blend the paint. Like I said, I’m not sure what you know, or don’t know about painting. Its not an easy thing to explain unless your right there with the person. Wish I was there, I’d paint it for you.
If you have any questions ask away.
CMOC Veteran
Joined: May 2011
Posts: 476
From: St. THomas
If you buff clear, make sure it doesn't get too hot. It's the heat that causes it to "burn" and start to swirl. If you buff it, do a little, then stop, do a little more and stop again...Not too much pressure either. Let the sander do the work..Use a random orbital sander with a sponge pad on it......and of course, the polish. But not too much.
Last edited by BLKnRD09GT; Feb 12, 2012 at 02:30 AM.

CMOC Rookie
Joined: Apr 2011
Posts: 106
From: Welland