
Project: Cheap thrills


Thread Starter
CMOC Rookie
Joined: Apr 2016
Posts: 51
From: NS
Got the parts home today and laud them out.
Crap!
I'm missing the passenger front fender extention and the 1/4 panel lower extention!
Called the gent and he's going to look for them.
I should have laid it all out and freakin checked before i left. But if he doesnt have them, all it would of meant is knocking a few bucks off. Can't make hm sell what he don't got either..
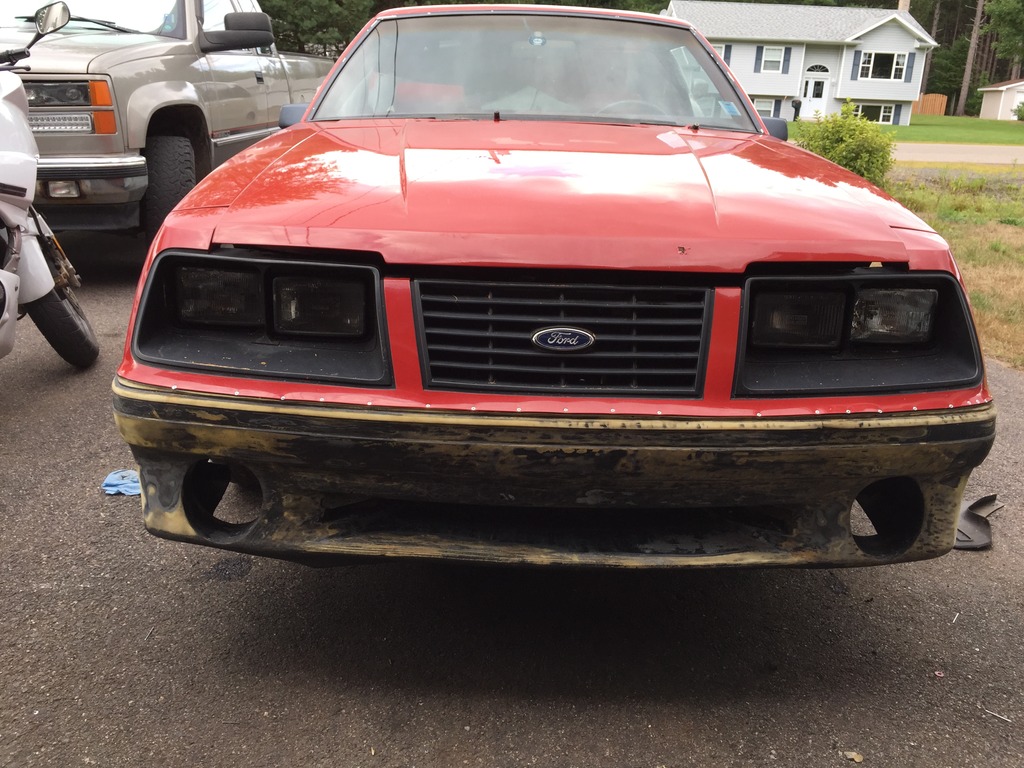
The nose piece is rough. I mean really rough. He told me sone kid was trying to do body work to it and it shows. The lower scoop is cut to ratshit (no idea why, makes no sense what was done to it), it looks like he tried to sand it with an angle grinder (!) and it's all covered in some kind of bedliner material that is a biatch to remove (paint stipper and gasket remover is getting the job done though). Couple tears too, but those are in the parts i'm going to be cutting away so the dont really matter. So far i've found black, red, white and a brandy wine color paint on the nose piece and some kind of rattlecan spray primer. Sheesh.
Its all stuff i can fix, but its just one more pita to deal with.
Well, i guess i can console myslef with the pieces i did get for 120 bucks. Assuming you can even find these body pieces (fat chance in atlantic canada), you'de pay a fair sight more than 120 bucks for them.
I'll just have to trade my "sweat equity" for the lower buy in price of...ahem...less than pristine parts....
Theres no free lunch......
Crap!
I'm missing the passenger front fender extention and the 1/4 panel lower extention!
Called the gent and he's going to look for them.
I should have laid it all out and freakin checked before i left. But if he doesnt have them, all it would of meant is knocking a few bucks off. Can't make hm sell what he don't got either..
The nose piece is rough. I mean really rough. He told me sone kid was trying to do body work to it and it shows. The lower scoop is cut to ratshit (no idea why, makes no sense what was done to it), it looks like he tried to sand it with an angle grinder (!) and it's all covered in some kind of bedliner material that is a biatch to remove (paint stipper and gasket remover is getting the job done though). Couple tears too, but those are in the parts i'm going to be cutting away so the dont really matter. So far i've found black, red, white and a brandy wine color paint on the nose piece and some kind of rattlecan spray primer. Sheesh.
Its all stuff i can fix, but its just one more pita to deal with.
Well, i guess i can console myslef with the pieces i did get for 120 bucks. Assuming you can even find these body pieces (fat chance in atlantic canada), you'de pay a fair sight more than 120 bucks for them.
I'll just have to trade my "sweat equity" for the lower buy in price of...ahem...less than pristine parts....
Theres no free lunch......
Last edited by Great white; Aug 13, 2016 at 08:28 PM.

CMOC Rookie
Joined: Aug 2016
Posts: 43
From: Saskatoon
I've done a fair bit of sanding on those ground effects and nose pieces. I don't know if they would be classified as having a "gel coat" but there is a bit of rubbery "give" to them and they can fuzz up if gone too far.
I hate those damn things, all of it. I ended up ordering a new nose for my 87, I've still yet to install.
I hate those damn things, all of it. I ended up ordering a new nose for my 87, I've still yet to install.
Thread Starter
CMOC Rookie
Joined: Apr 2016
Posts: 51
From: NS
Theyre polyurethane (PUR), which is a thermosetting material. Basically, like a two part epoxy.
Its sandable like a bodyfill material as long as you do it right. Its also why you have to bond it together instead of melt it together. It will burn before it melts.
Polyolefin (what most modern vehicles use, often refered to as TPO) is a pita to sand because its a thermoplastic material. Ie: it melts with too much heat and sanding causes heat. Can be sanded if done properly. Can also be bonded if using the right products, but is often just plastic welded because its a thermoplastic.
No worries on body working it, I've done this stuff many times before.
Thread Starter
CMOC Rookie
Joined: Apr 2016
Posts: 51
From: NS
grabbed a couple pics off the internet and did a quick concept photochop:
Colors, shading and perspective is a little janked up, but it was thrown together just to get a quick visual of what a finished product might look like before cutting the PUR.
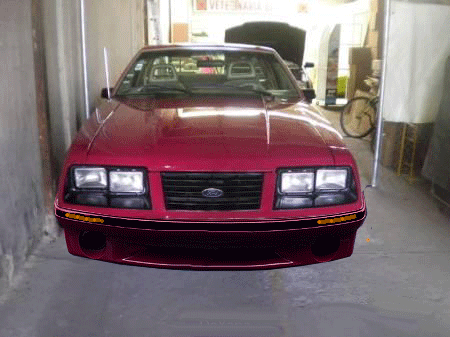
Probably not to everyone's liking, but I like it. I've always thought the 83-84 foxes have been the widest looking and "sharpest nosed" fox Mustangs (which I like), and this seems to make it (visually) even wider yet.
It's perhaps a little heavier looking than a stock 83:
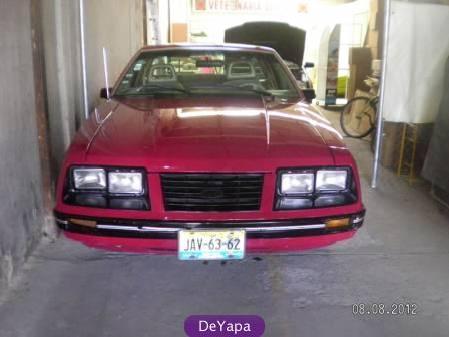
But the 83 nose has always looked kind of "anorexic" to me to begin with.
No fog lights going on this car. Since I'm carbureted, I'll draw my air through the light openings through inner fender ducting. Intention is to make a bifurcated duct for each opening and feed the carb through a dual snorkel cleaner and route the second tube from each opening to corresponding brake cooling ducts. I'm not going crazy on the braking package, just a set of 95 spindles and 11" brakes with PBR calipers. Brake cooling will be a welcome addition if I ever "push it hard".
I especially like that bifurcated duct idea as it means I can get away without mounting the 79-83 scoop on the hood and still feed lots of fresh air to the carb. I'm not looking forward to cluttering up the engine bay with two air cleaner ducts, but so be it. Better than jamming a hole in the hood and dropping a scoop over it.
Bumper cover goes under the knife this weekend.
Colors, shading and perspective is a little janked up, but it was thrown together just to get a quick visual of what a finished product might look like before cutting the PUR.
Probably not to everyone's liking, but I like it. I've always thought the 83-84 foxes have been the widest looking and "sharpest nosed" fox Mustangs (which I like), and this seems to make it (visually) even wider yet.
It's perhaps a little heavier looking than a stock 83:
But the 83 nose has always looked kind of "anorexic" to me to begin with.
No fog lights going on this car. Since I'm carbureted, I'll draw my air through the light openings through inner fender ducting. Intention is to make a bifurcated duct for each opening and feed the carb through a dual snorkel cleaner and route the second tube from each opening to corresponding brake cooling ducts. I'm not going crazy on the braking package, just a set of 95 spindles and 11" brakes with PBR calipers. Brake cooling will be a welcome addition if I ever "push it hard".
I especially like that bifurcated duct idea as it means I can get away without mounting the 79-83 scoop on the hood and still feed lots of fresh air to the carb. I'm not looking forward to cluttering up the engine bay with two air cleaner ducts, but so be it. Better than jamming a hole in the hood and dropping a scoop over it.
Bumper cover goes under the knife this weekend.
Last edited by Great white; Aug 18, 2016 at 08:42 PM.
Thread Starter
CMOC Rookie
Joined: Apr 2016
Posts: 51
From: NS
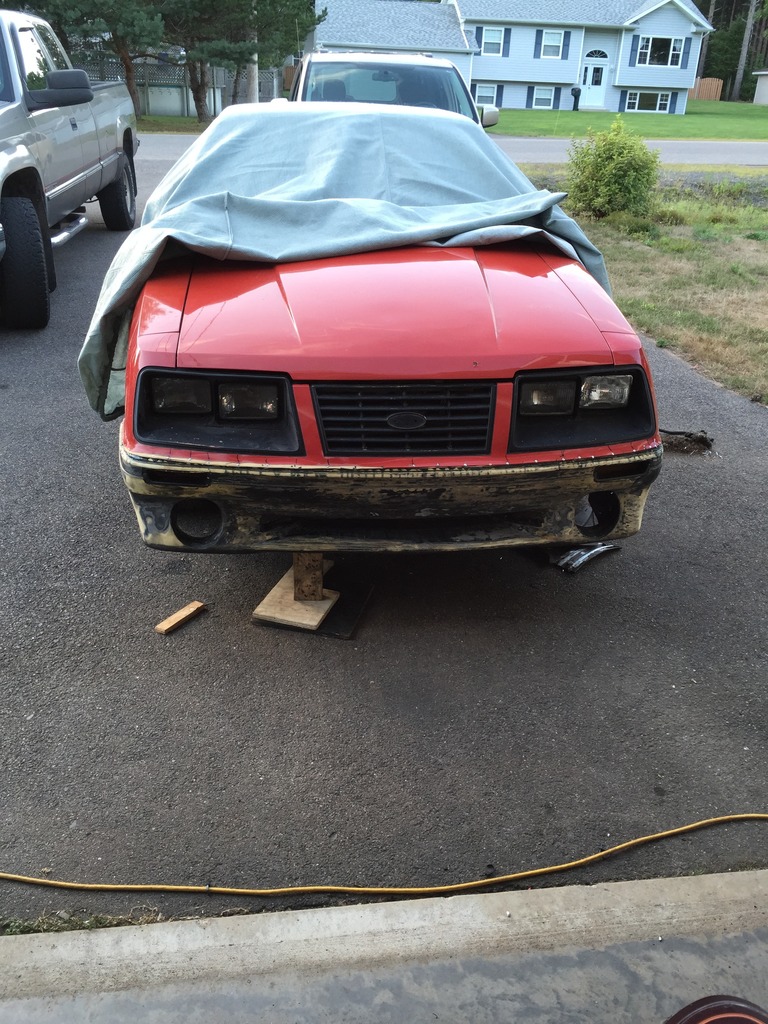
First fitting:
Not too shabby. Only pop rivets holding it on right now for shaping and fitting.
I wanted urethane bonding only, but its so flexible i may have to leave the pop rivets in to keep it uniform while bonding and bury them in the urethane bonding agent.
I will still urethane it together front and back, the pop rivets wont be visible after body work. While the urethane should be more than enough to make it one piece, the pop rivets will also add a mechanical bond as well. Should be a pretty solid piece once done.
I used small rivets just in case so the heads should be easy to bury. They "indented" themselves slightly in the cover, so they're already recessed a bit quick will help in hiding them. I may remove them and switch to a countersunk type rivet in order to make it a smidge easier to cover with the urethane. Couple passes with the DA and it should be a done deal.
A nice bonus from removing the inner fender liners was that i could reach up into the plenum and feel around the air horn on the drivers side. After pulling out more "mouse house" crap, all i could feel was smooth OEM paint. The pinch welds and metal surfaces are all in great shape. Unbelievable for an 83 that's lived it whole life on the Atlantic coast, but this car has always been good to me. So, hopefully, all i have to repair on the cowl this winter is about a 6x6" area beside the drivers side air horn. That's good news. I though I'd have to make a whole new cowl piece and have horrible rust problems in the pinch seams.
An unwelcome surprise was damage and rust on the drivers side radiator panel. It looks like someone had driven over something, jammed the corner of the panel up, then tried to pound it back out and had brazed (!) a piece of thin metal over it all. This was a very funny thing to find since ive basically owned the car since new. All i can figure is the ex wife must have damaged the car when i was away on one of my business trips and had someone cobble it back up before i came home with me none the wiser. So that's something unexpected I will have to address this winter as well......
Last edited by Great white; Aug 21, 2016 at 07:02 AM.
Thread Starter
CMOC Rookie
Joined: Apr 2016
Posts: 51
From: NS
Upper and lower bonded together with the urethane, turn signal openings added and bonded in:
It's (essentially) back to being one piece of urethane again.
I'd like to say it was easy, but it wasn't.
It was a major pita.
I separated the two pieces and prepped the surfaces. The two part urethane was runnier than I expected and ran down the front on one side while I was still running the bead to the other side. Lining the two parts back up and pop riveting them together again was a massive rush as I only had a 5 minute work time. Once back together and starting to cure, I flipped it over and applied another thick bead on the back across the two pieces and bonded/filled the turn signal openings into the bumper surface. The turn signal openings are the ones from the 83 lower bumper piece. I just cut them out, split them in half and removed about 1.5" from each. The narrower slit fits the 87+ bumper strip much better than if I had left them full width.
That piece of 2x4 is there because I was heat shaping the lower opening and it's just keeping it from sagging while it cools.
That wraps up this weekend.
Next weekend will be filling and shaping.
Last edited by Great white; Aug 21, 2016 at 07:32 PM.


Thread Starter
CMOC Rookie
Joined: Apr 2016
Posts: 51
From: NS
My K-member was found to have a very weird rust line on it. Rust through is more accurate.
Kind of P's me off and the rest of the K member is spotless. What happened is there's an OEM brake line that runs along the back lip of the K-member. Over the years this accumulated dirt between the line and the K-member. The dirt got wet in the course of the years, remained wet and caused the k-member to rot out in that one specific spot. It's like you took a grinder and cut a 1/2" slot the full width of the crossmember.
So it's weld it or replace it.
Welding isn't very appealing to me, although it is do-able. It's a critical structural and chassis geometry item and welding can warp it if not done right. Replacement with a Fox crossmember is highly unlikely as you just won't find one in scrap yards around here any more. Returned to the earth or have long since been crushed for Japanese razor blades.
But you can still find a few SN95's in the yards here.
Using some "google-fu" reveals that an sn95 K member will bolt in to a fox chassis. The caveat is you need a 94-95 SN95 in order to get the right engine mounting pads. Seems 96+ SN95's had engine mounting pads for the modular engine. The V6 also had the rubber engine mounts changed to fit the modular K member engine pads. Apparently, gents even us the modular SN95 k member to do modular swaps in to a fox.
But, in 94-95, the engine choices were the 302 and the 3.8. As a result, they swap into a fox and have the correct engine mount pads.
Since I've already sourced some 95 SN95 spindles from the local yard, I knew there was a 95 there. A quick stop on the way home from work to check it out and yup, crossmember appears to be in good shape and car isn't there because it was hit (engine failure) so everything is still straight.
Boys are going to pull it for me next week and 150 bucks will make it mine. More than I had hoped it would be, but not completely out of line.
When i get it home I'll strip it down for a thorough inspection, do some modifications and then give it a fresh coat of paint.
I plan to make changes to it as listed in Mathis' "Mustang performance handbook". Moves the crossmember forward and the engine moves back approx 1". Makes for better front to rear balance and increased caster for better on center feel.
The Sn95 is also reported to have a bit better steering rack location for increased Ackerman, which will also be a welcome improvement.
I'll have to re-use my fox a arms as the SN95 arms with the SN95 spindles will make it too wide for my fox fenders.
I'm still PO'd my crossmember was rotted out in only one stupid spot, but I'm trying to look at it positively and will (hopefully) end up with a better handling fox after it's all done (and at a bargain price).
A tubular K member would have been nice and dropped some weight off the nose, but it just isn't in the budget. Between shipping and exchange rates it woudl just have been too expensive for one that I would actually want to buy.
Last edited by Great white; Aug 26, 2016 at 04:48 PM.


